These are the steps we are going to follow:
- VPCs creation;
- Transit Gateway and route table configuration;
- Deployment of a Red Hat OpenShift on AWS (ROSA) cluster using the OpenShift Cluster Manager on console.redhat.com;
- Publishing DNS in the public VPC;
- Deployment of a Jump server to access the private subnets.
VPCs Creation
We are going to create 3 VPCs:
- Egress VPC: This VPC is the only public one, which has an Internet and NAT Gateway. All egress traffic flows through this VPC. Our jump server will also be in this VPC, as it is the only one with public internet access.
- ROSA VPC: Private VPC in which we are going to install the Red Hat OpenShift on AWS (ROSA) cluster.
- Other VPC: This VPC would represent other services that applications on OpenShift would be interacting with, such as Databases, APIs, etc.
The following table has the details of the VPCs we are going to create:
| VPC Name | CIDR block | Subnets |
|---|---|---|
| egress-vpc | 10.0.0.0/24 | us-east-1a egress-subnet-public1-us-east-1a - 10.0.0.0/28 egress-subnet-private1-us-east-1a - 10.0.0.128/28 |
| ocp-vpc | 10.1.0.0/16 | us-east-1a ocp-subnet-private1-us-east-1a - 10.1.128.0/20 us-east-1b ocp-subnet-private2-us-east-1b - 10.1.144.0/20 us-east-1c ocp-subnet-private3-us-east-1c - 10.1.160.0/20 |
| integration-vpc | 10.2.0.0/16 | us-east-1a integration-subnet-private1-us-east-1a - 10.2.128.0/20 us-east-1b integration-subnet-private2-us-east-1b - 10.2.144.0/20 us-east-1c integration-subnet-private3-us-east-1c - 10.2.160.0/20 |
Follow the steps below to create the VPCs:
- Access your AWS account and navigate to the VPC feature of the desired region.
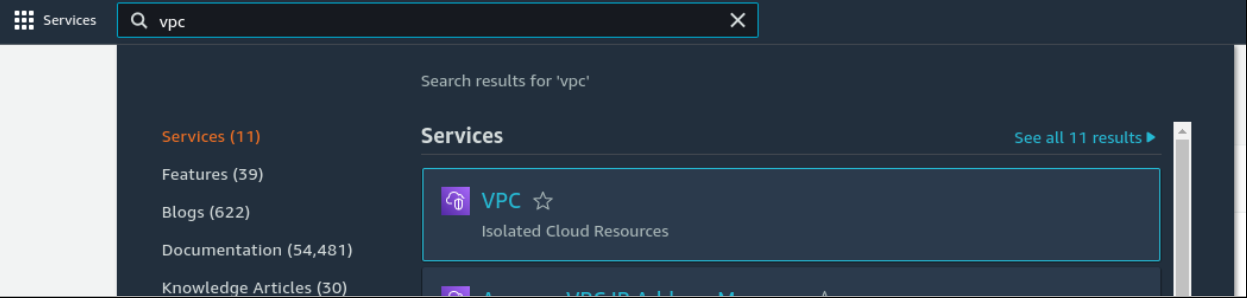
- Click on Create VPC button on the top right corner of the screen.

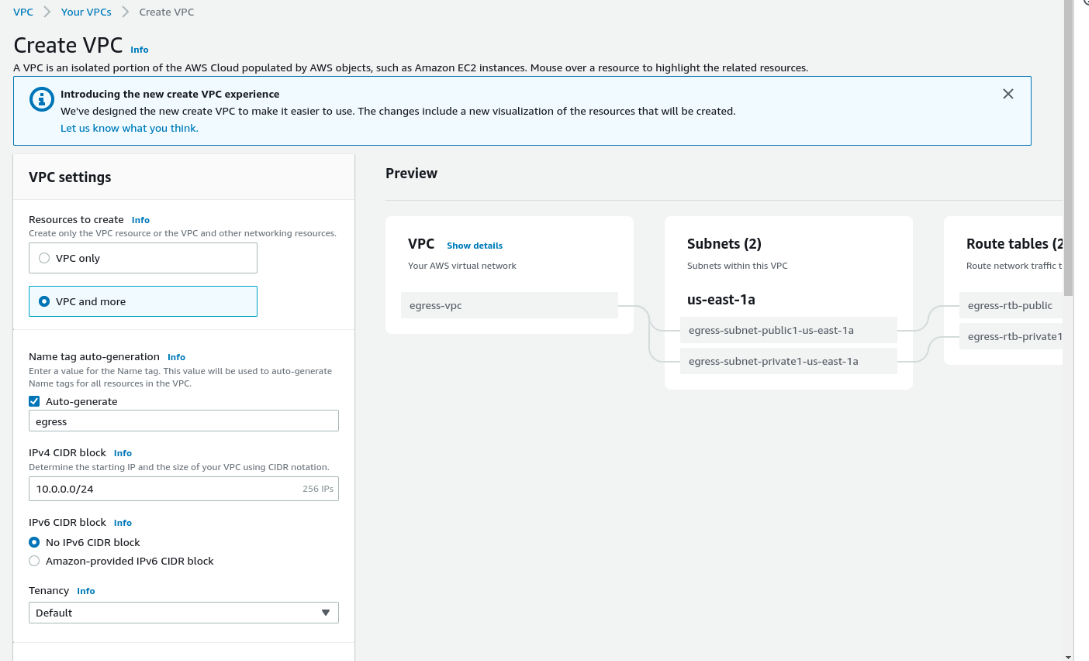
- Fill out the form for the egress-vpc:
- Resources to create: VPC and more
- Name tag auto-generation: egress
- IPv4 CIDR block: 10.0.0.0/24 (*)
- IPv6 CIDR block: No IPv6 CIDR block
- Number of Availability Zones (AZs): 1
- Number of public subnets: 1
- Number of private subnets: 1
- Public subnet CIDR block in us-east-1a: 10.0.0.0/28 (*)
- Private subnet CIDR block in us-east-1a: 10.0.0.128/28 (*)
- NAT gateways ($): In 1 AZ
- VPC endpoints: S3 Gateway
- Enable DNS hostnames: enabled
- Enable DNS resolution: enabled
(*) You may customize the CIDR ranges as you need, just make sure there are no overlaps between the CIDRs of each VPCs and subnets.
- Repeat the same thing to create the OpenShift VPC (ocp-vpc):
- Resources to create: VPC and more
- Name tag auto-generation: ocp
- IPv4 CIDR block: 10.1.0.0/16 (*)
- Number of Availability Zones (AZs): 3
- Number of public subnets: 0
- Number of private subnets: 3
- Private subnet CIDR block (1a, 1b, 1c): 10.1.128.0/20, 10.1.144.0/20, 10.1.160.0/20
- NAT gateways ($): None
- VPC endpoints: S3 Gateway
- Enable DNS hostnames/resolution: enabled
- Finally, create the integration-vpc:
- Resources to create: VPC and more
- Name tag auto-generation: integration
- IPv4 CIDR block: 10.2.0.0/16 (*)
- Number of Availability Zones (AZs): 3
- Number of public subnets: 0
- Number of private subnets: 3
- Private subnet CIDR block (1a, 1b, 1c): 10.2.128.0/20, 10.2.144.0/20, 10.2.160.0/20
- NAT gateways ($): None
Transit Gateway and route table configuration
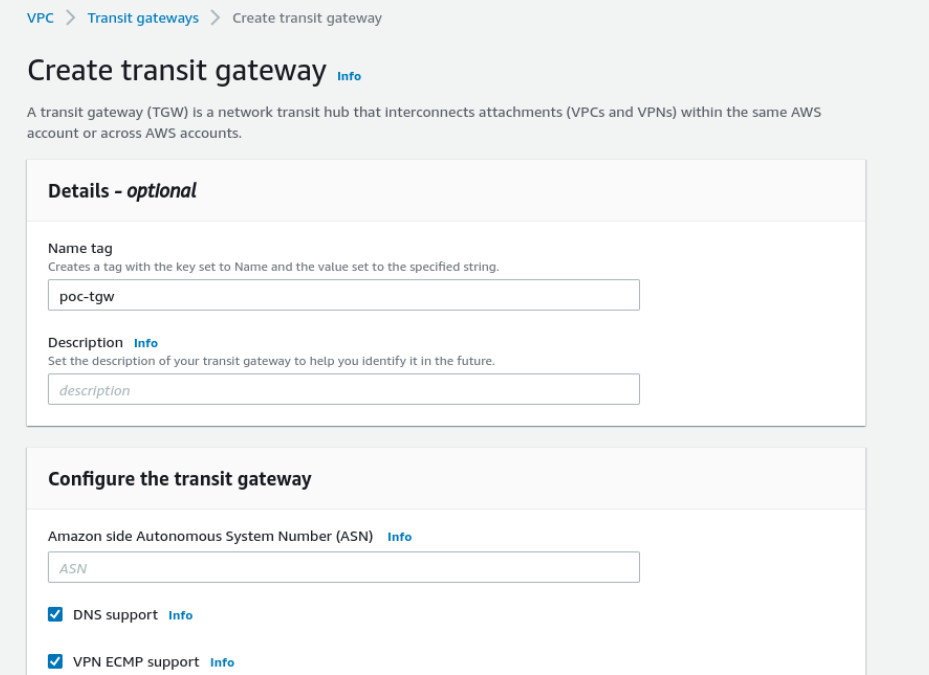
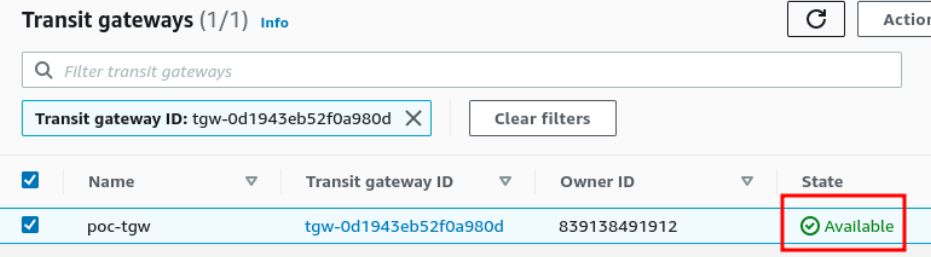
- With VPCs created we can go ahead and create the Transit Gateway. Access the Transit Gateway menu and click on Create transit gateway. Give it a name and wait until the state is Available.
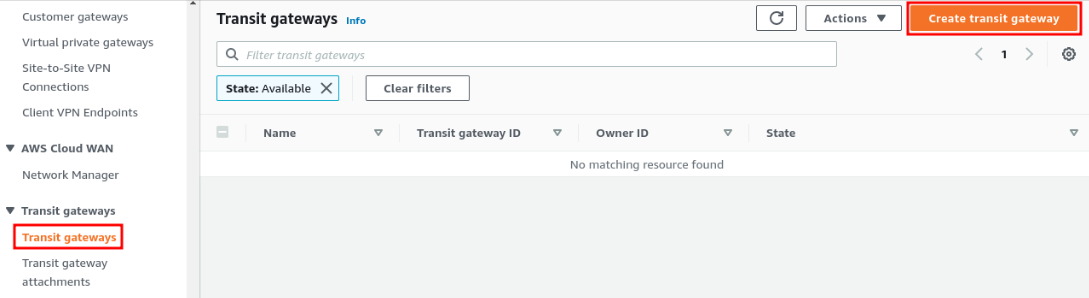
- On the screen give it a name and click on Create transit gateway attachments.

- Wait one minute or two until you see the transit gateway state as Available:
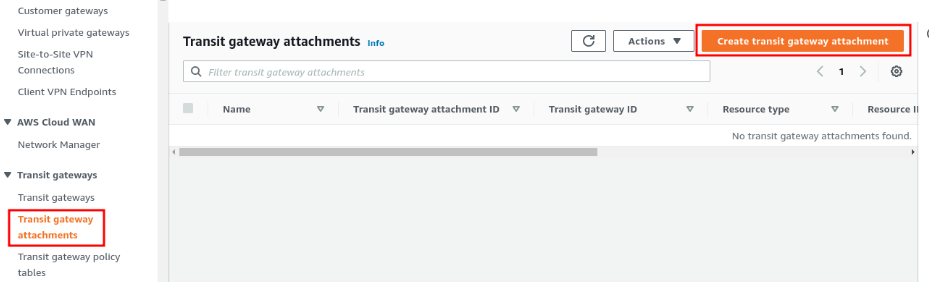
- Now we need to create Transit gateway attachments for each VPC. Access the Transit gateway attachments menu and click on Create transit gateway attachment button:
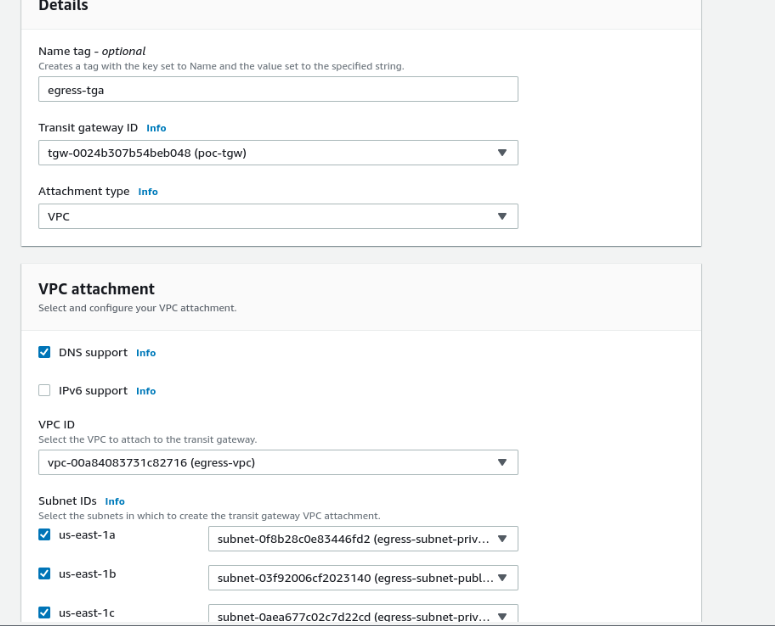
- Give the name egress-tga, select the transit gateway that has been just created, egress-vpc, leave all subnets enabled, and click on Create transit gateway attachment button.
- Repeat the same step for ocp-vpc and integration-vpc. Wait some minutes until all TGA state is Available.

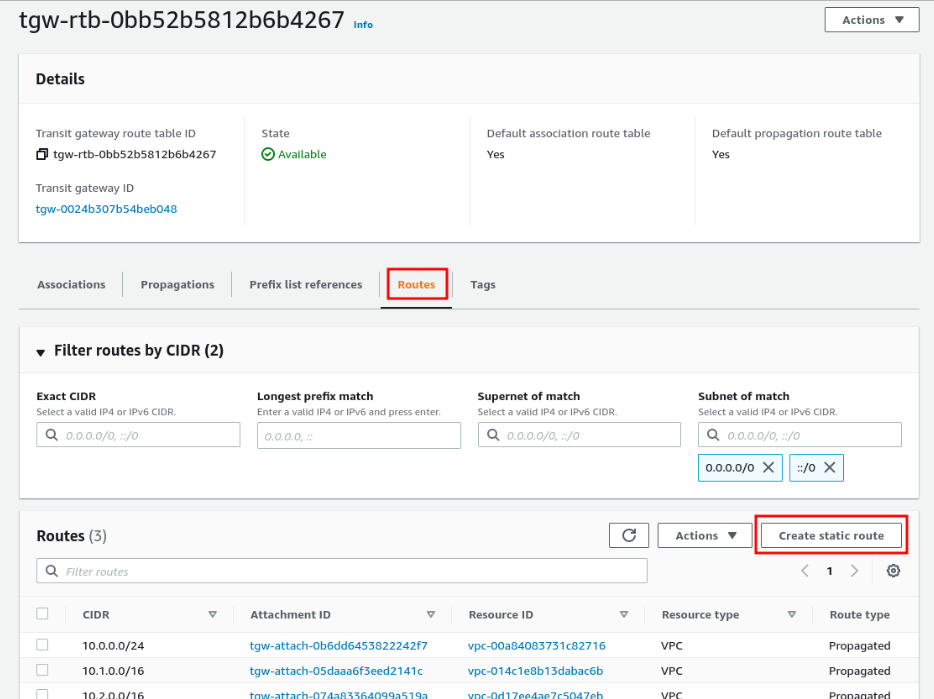
- Now access Transit gateway route tables and click on the one that has been automatically created with the TGW.
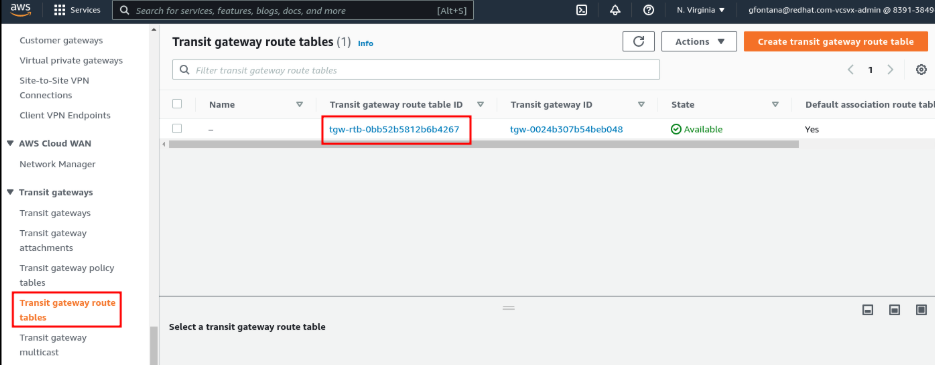
- Access the Routes tab and click on Create static route button.
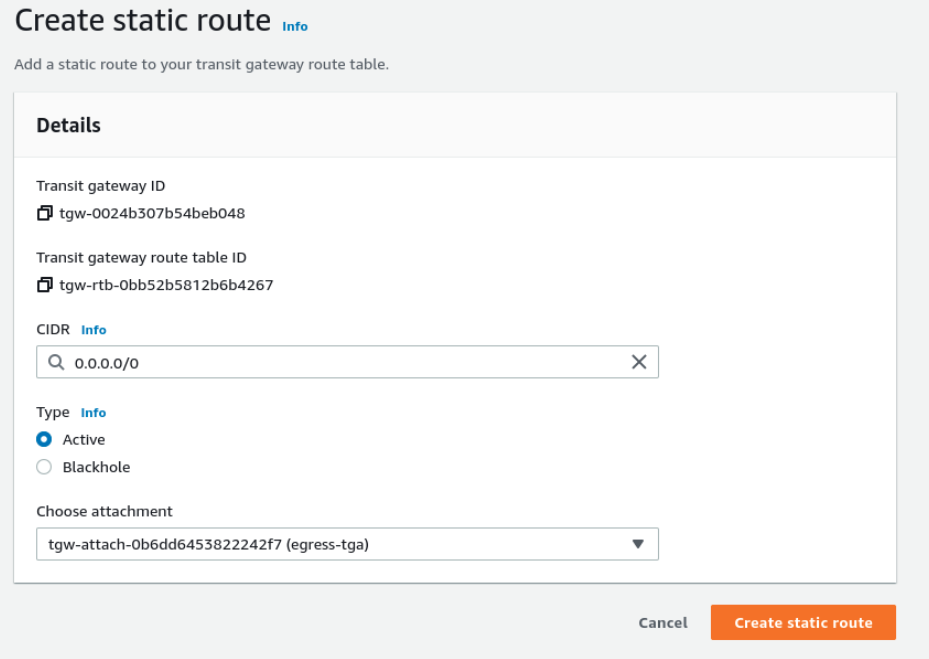
- Add the following route:
- CIDR: 0.0.0.0/0
- Attachment: egress-tga
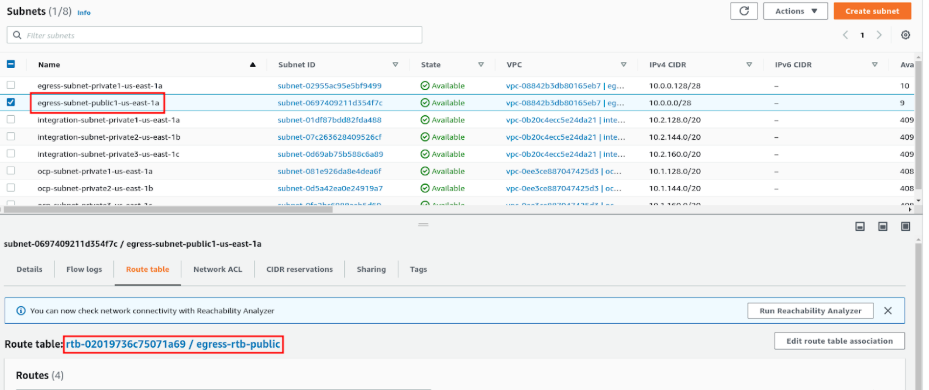
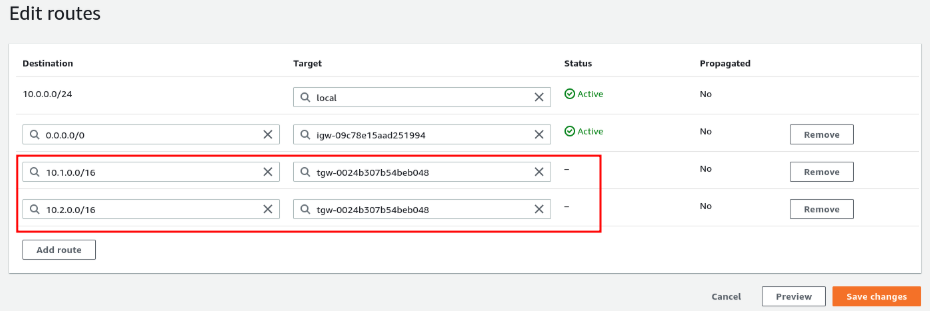
- We need to configure the egress private subnet route table to allow network packages to return back to the VPCs using the transit gateway. To do so, access one of the egress public subnets and click over the route table link:
- Then click on the Routes tab and Edit routes button.
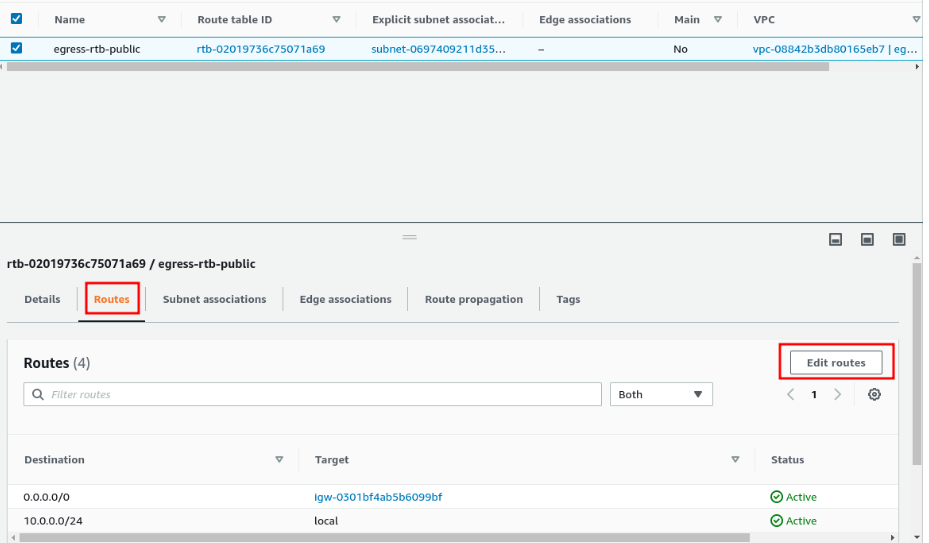
- Add the following routes:
- 10.1.0.0/16 - Transit Gateway
- 10.2.0.0/16 - Transit Gateway
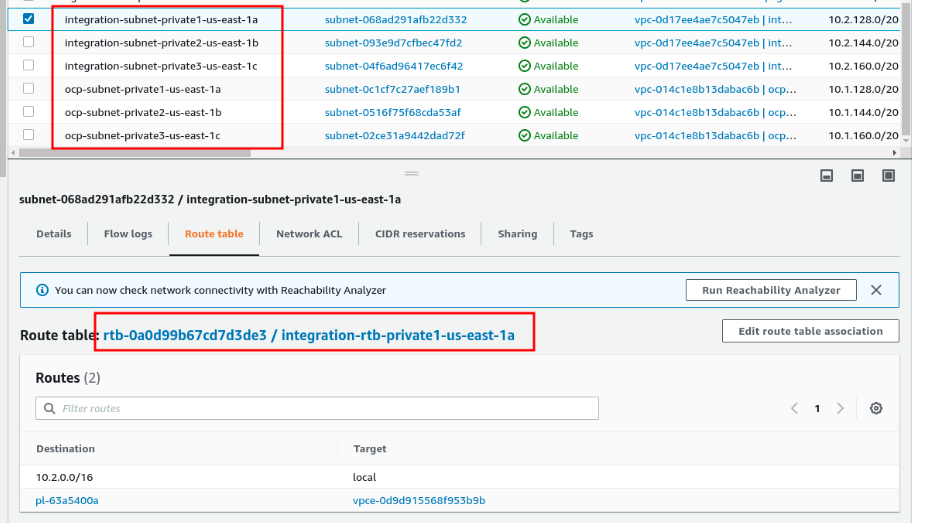
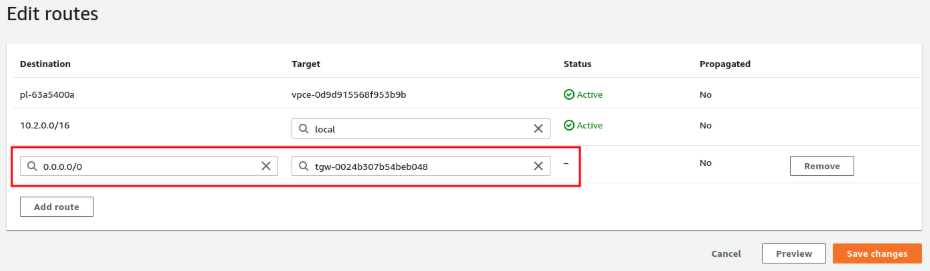
- Finally, we need to add the following rule on all subnets of ocp and integration VPCs to enable these subnets to use the Transit Gateway. To do so, click on the subnet, access the Route table tab, and click over the Route table link:
- 0.0.0.0/0 - Transit Gateway
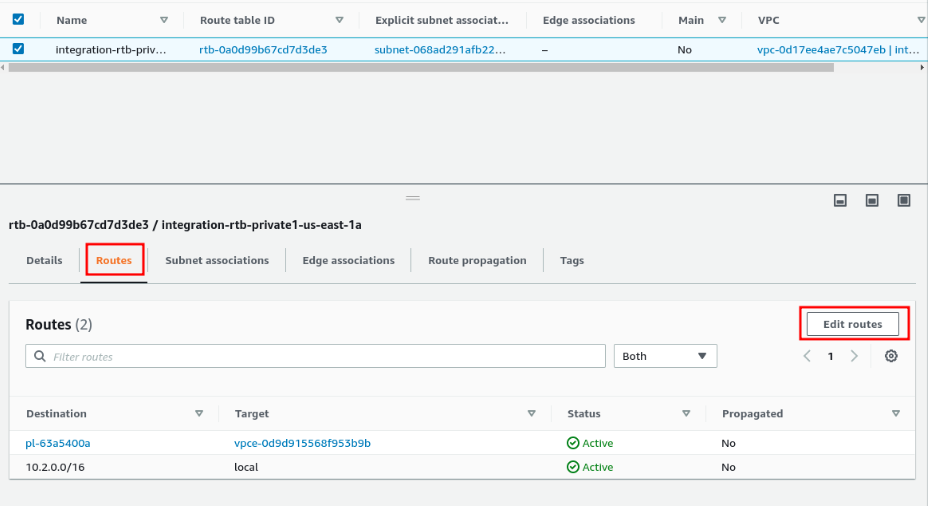
- Click on Edit routes:
- Add the rule:
This concludes the configuration required on Transit Gateway and route tables. See next how to install Red Hat OpenShift for AWS (ROSA) on this infrastructure.
Deployment of a Red Hat OpenShift on AWS (ROSA) cluster
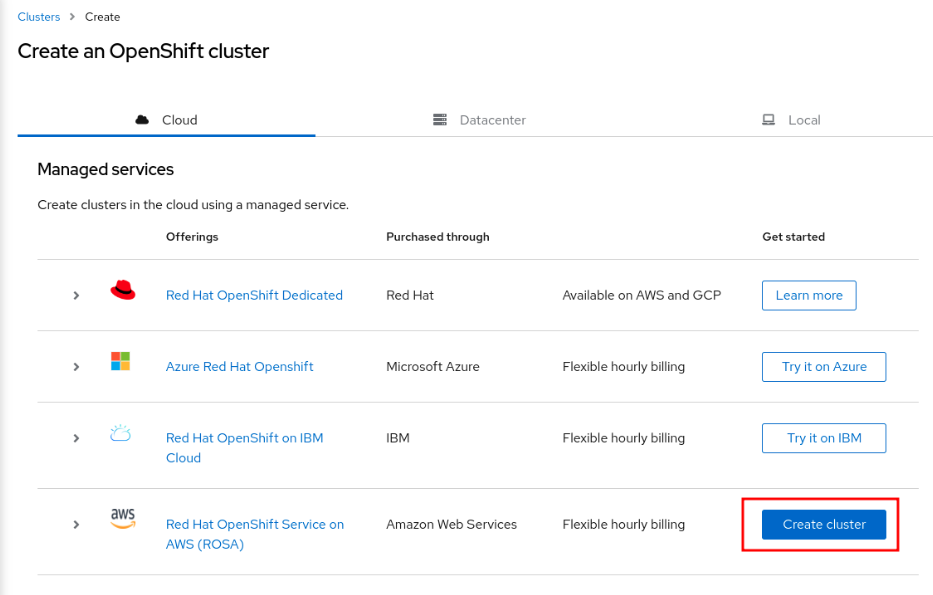
First, access the Red Hat Hybrid Cloud console: https://console.redhat.com/openshift/create. If you don’t have an account use the link Register for a Red Hat account to create one. Click on Create cluster button next to the Red Hat OpenShift Service on AWS (ROSA).
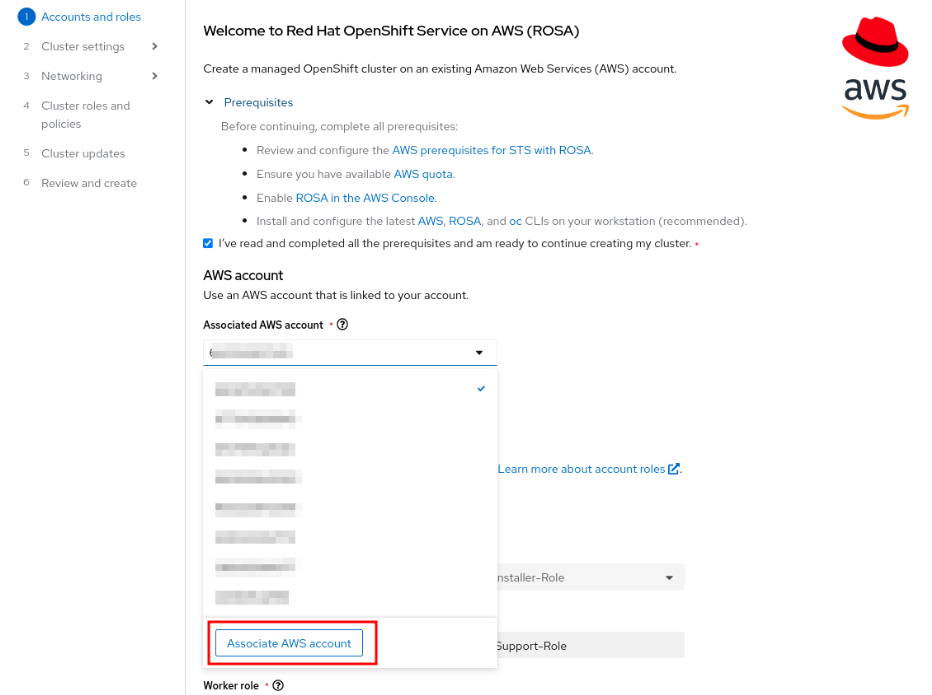
The first step required is to link your AWS account to your Red Hat console. To do so you will need a workstation with the AWS CLI installed and configured beforehand. Look at the references at the end of this article if you need instructions on how to install and use the AWS CLI. On the first page, click on the Associated AWS account combo box and Associate AWS account button.
Follow the instructions on the screen to download the rosa cli:
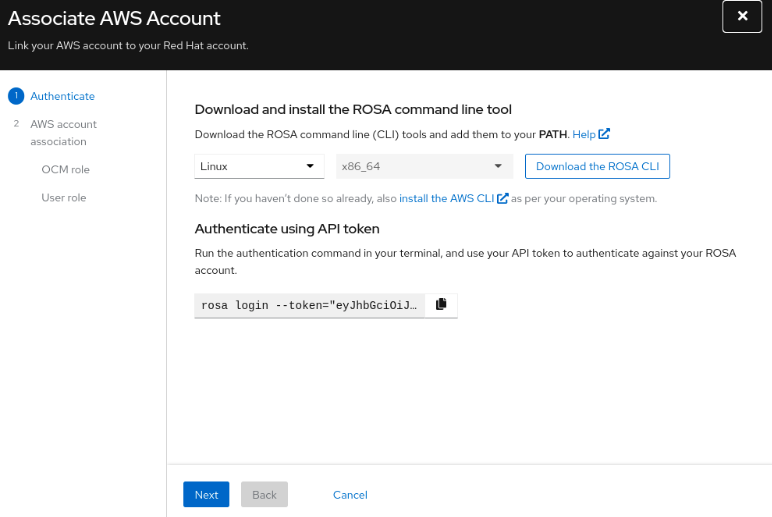
Copy the rosa login command and run it from your workstation.
$ rosa login --token="eyJhbGciOiJIUzI1NiIsInR5cCIgOiAiSldUIiwia2*********"
I: Logged in as '******' on 'https://api.openshift.com'

$ rosa create ocm-role --admin
I: Creating ocm role
? Role prefix: ManagedOpenShift
? Permissions boundary ARN (optional):
? Role creation mode: auto
I: Creating role using 'arn:aws:iam::********:user/*****@******-admin'
? Create the 'ManagedOpenShift-OCM-Role-11009103' role? Yes
I: Created role 'ManagedOpenShift-OCM-Role-11009103' with ARN 'arn:aws:iam::839138491912:role/ManagedOpenShift-OCM-Role-11009103'
I: Linking OCM role
? OCM Role ARN: arn:aws:iam::*********:role/ManagedOpenShift-OCM-Role-11009103
? Link the 'arn:aws:iam::*********:role/ManagedOpenShift-OCM-Role-11009103' role with organization '**********'? Yes
I: Successfully linked role-arn 'arn:aws:iam::*********:role/ManagedOpenShift-OCM-Role-11009103' with organization account '**********'

$ rosa create user-role
I: Creating User role
? Role prefix: ManagedOpenShift
? Permissions boundary ARN (optional):
? Role creation mode: auto
I: Creating ocm user role using 'arn:aws:iam::*******:user/******@*****-admin'
? Create the 'ManagedOpenShift-User-******-Role' role? Yes
I: Created role 'ManagedOpenShift-User-******-Role' with ARN 'arn:aws:iam::*******:role/ManagedOpenShift-User-******-Role'
I: Linking User role
? User Role ARN: arn:aws:iam::******:role/ManagedOpenShift-User-******-Role
? Link the 'arn:aws:iam::839138491912:role/ManagedOpenShift-User-******-Role' role with account '*****'? Yes
I: Successfully linked role ARN 'arn:aws:iam::******:role/ManagedOpenShift-User-******-Role' with account '*********'
After you run these commands successfully, you should now see your AWS account listed in the Associated AWS account combobox:
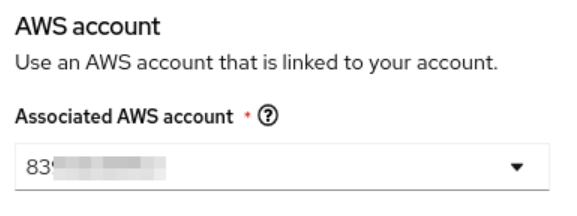
You will still see the following message, indicating that you need to create the account roles.
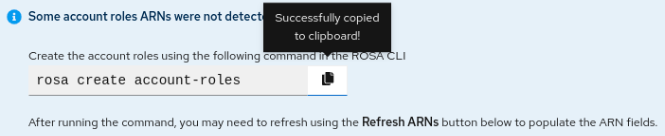
To do so, run the command as described in the message:
$ rosa create account-roles
I: Logged in as '*****' on 'https://api.openshift.com'
I: Validating AWS credentials...
I: AWS credentials are valid!
I: Validating AWS quota...
I: AWS quota ok. If cluster installation fails, validate actual AWS resource usage against https://docs.openshift.com/rosa/rosa_getting_started/rosa-required-aws-service-quotas.html
I: Verifying whether OpenShift command-line tool is available...
(...)
I: Created policy with ARN 'arn:aws:iam::****:policy/ManagedOpenShift-openshift-machine-api-aws-cloud-credentials'
I: Created policy with ARN 'arn:aws:iam::****:policy/ManagedOpenShift-openshift-cloud-credential-operator-cloud-crede'
I: Created policy with ARN 'arn:aws:iam::****:policy/ManagedOpenShift-openshift-image-registry-installer-cloud-creden'
I: Created policy with ARN 'arn:aws:iam::****:policy/ManagedOpenShift-openshift-ingress-operator-cloud-credentials'
I: Created policy with ARN 'arn:aws:iam::****:policy/ManagedOpenShift-openshift-cluster-csi-drivers-ebs-cloud-credent'
I: Created policy with ARN 'arn:aws:iam::****:policy/ManagedOpenShift-openshift-cloud-network-config-controller-cloud'
I: To create a cluster with these roles, run the following command:
rosa create cluster --sts
Now click on Refresh ARNs button and we should be good to go:
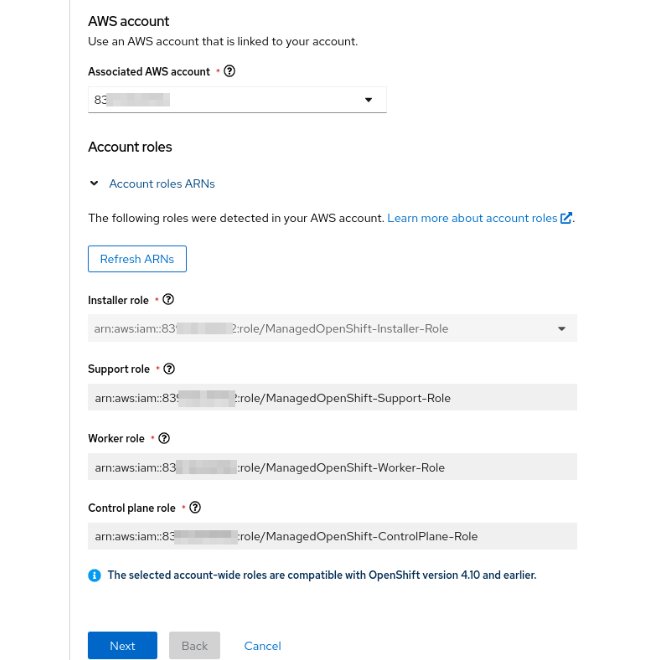
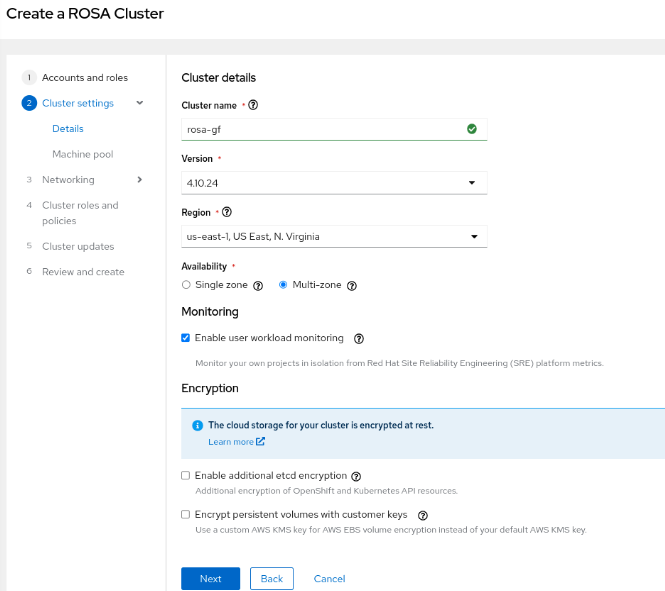
On the next page fill out the Cluster name and set the Availability to Multi-zone.
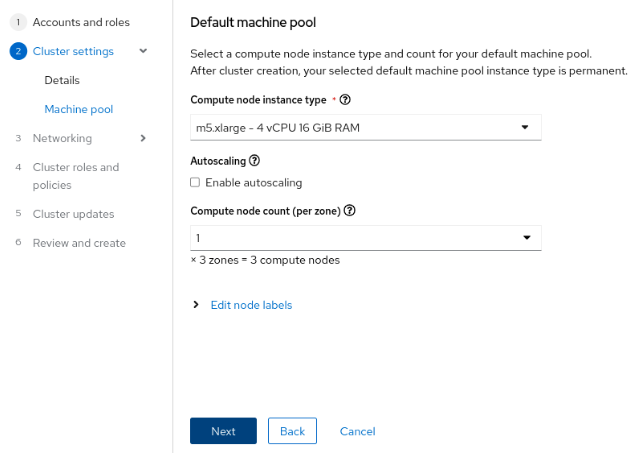
Change the machine pool size if you want or leave it as-is:
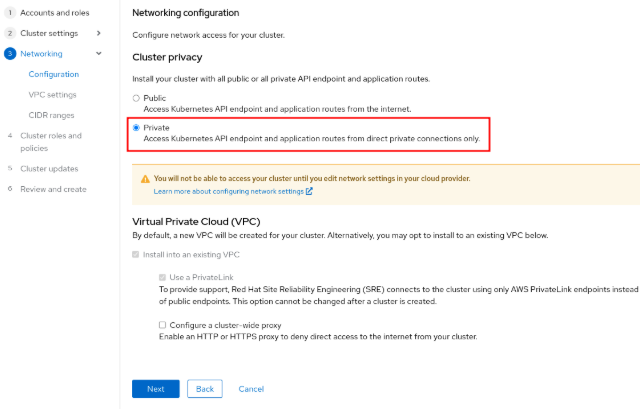
Change the Cluster privacy to Private:
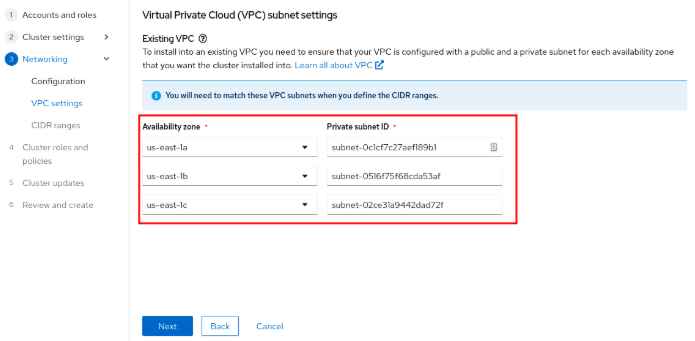
Now copy the private subnet IDs from the ocp VCP we created before and paste here:
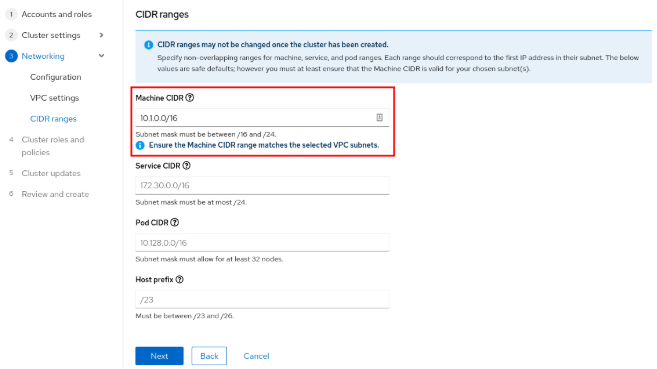
Set the Machine CIDR to the same range you used with the ocp VPC:
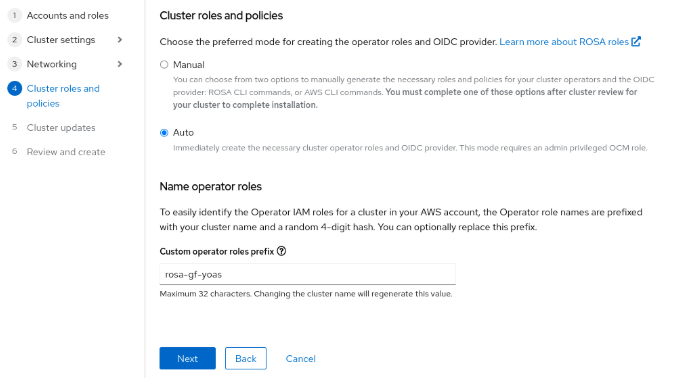
You don’t need to change the Cluster roles and policies.
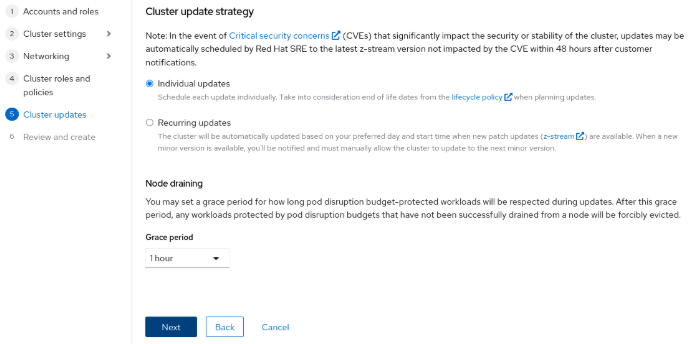
Set the update strategy according to what you need:
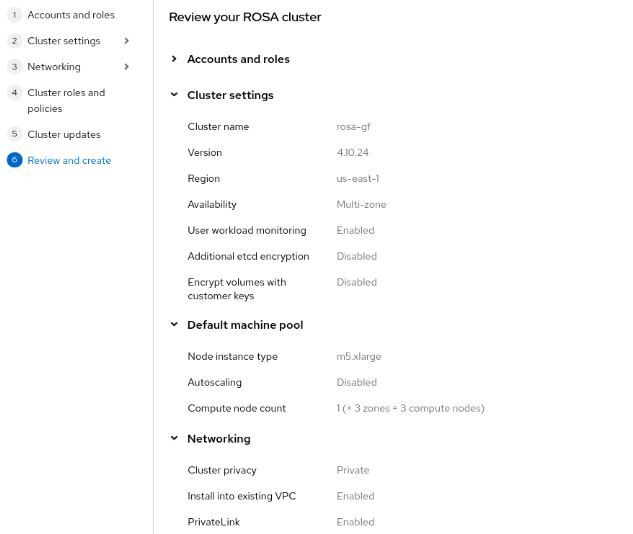
Now review the information provided and start the cluster provisioning:
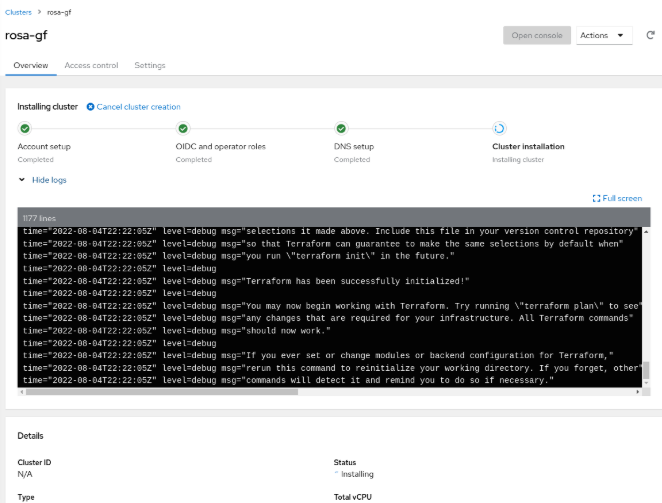
You will need to wait from 40 minutes to 1 hour to have your cluster available:
When the cluster is available you will be automatically redirected to a page with the main details of your cluster.
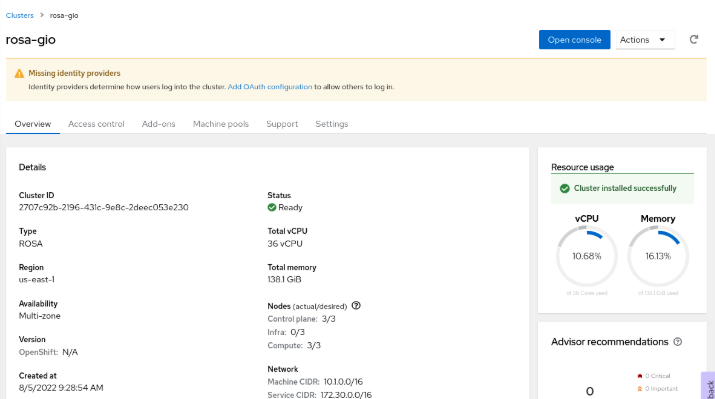
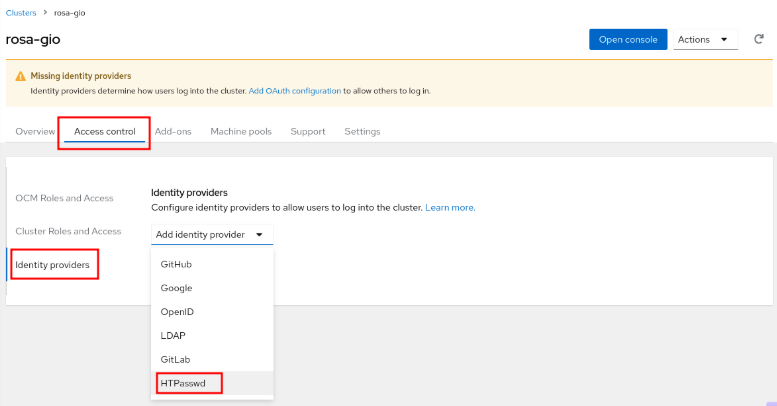
To access our cluster we need to add an identity provider and a cluster-admin user. Click in the Access control tab, then Identity providers and select the HTPasswd:
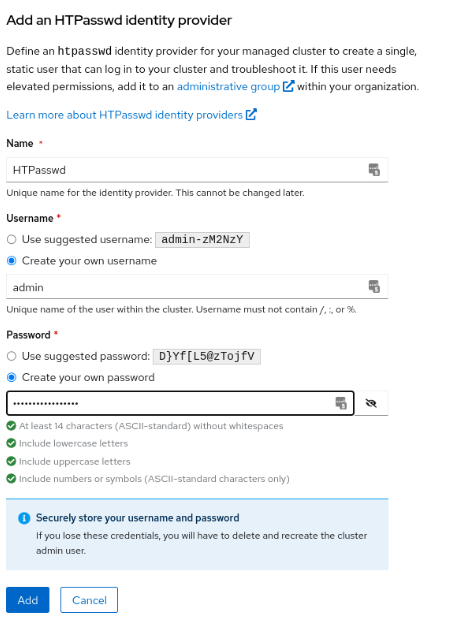
Now set the desired admin user and password:
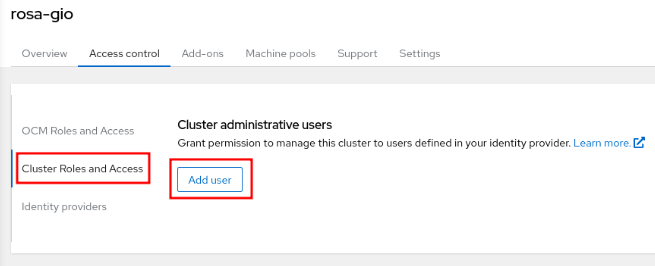
Now go back to the Access control tab and click on Add user button at Cluster Roles and Access feature.
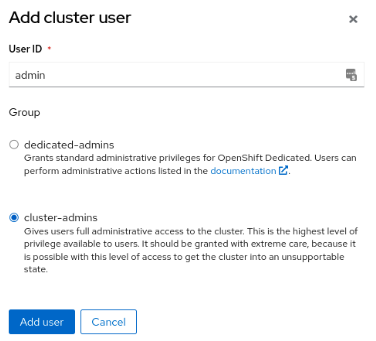
Add the user you just created as a cluster-admin.
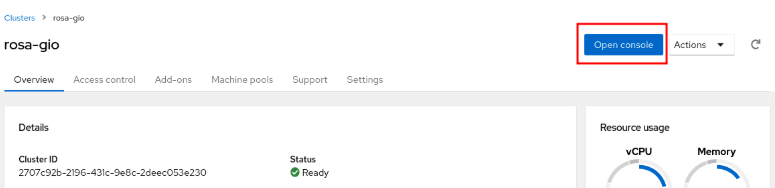
To check the console URL, click on the Open console button. You will not be able to access the console, as expected, as this is a private cluster.
We are going to use a jump server to access the console.
Publishing DNS in the public VPC
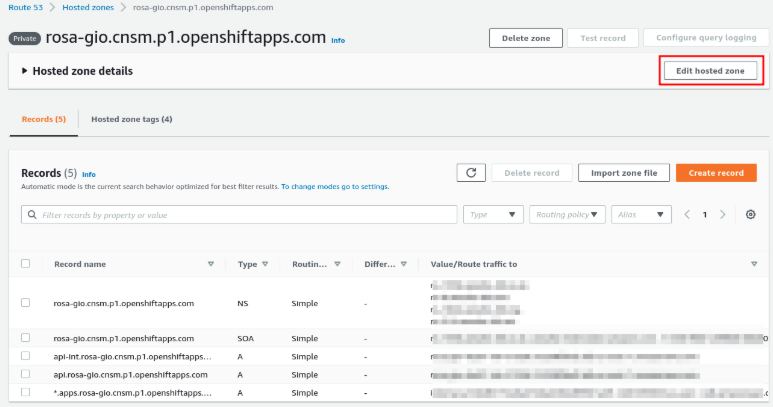
Our cluster is private, so the DNS domain created by ROSA is. To be able to access the console and applications from the egress VPC, we should add this VPC to the DNS domain created by ROSA. To do so, access the AWS Route-53 of your AWS account, access the domain created by ROSA (it ends with openshiftapps.com), and click on the Edit hosted zone button.
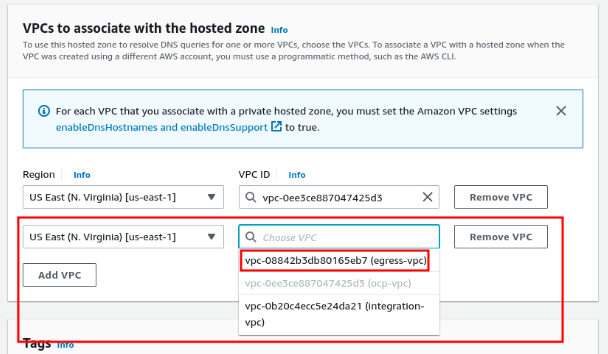
Now add the egress VPC in this domain:
Deployment of a Jump server to access the private subnets
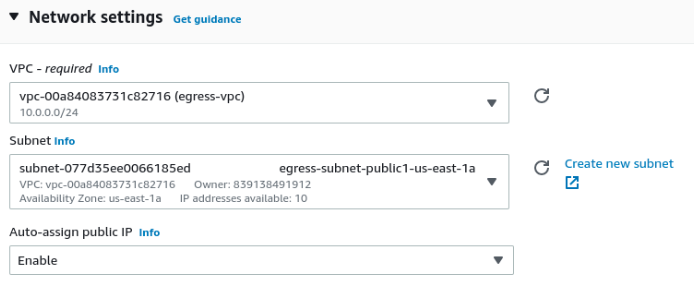
Now launch a new instance to be our jump server. You can provision any OS you prefer, such as Windows, Fedora, Red Hat, or Ubuntu that has a GUI with a supported browser version (Firefox, Chrome, or Edge). Make sure you select the egress VPC and the public subnet. Assign a public IP and use it to connect to that instance.
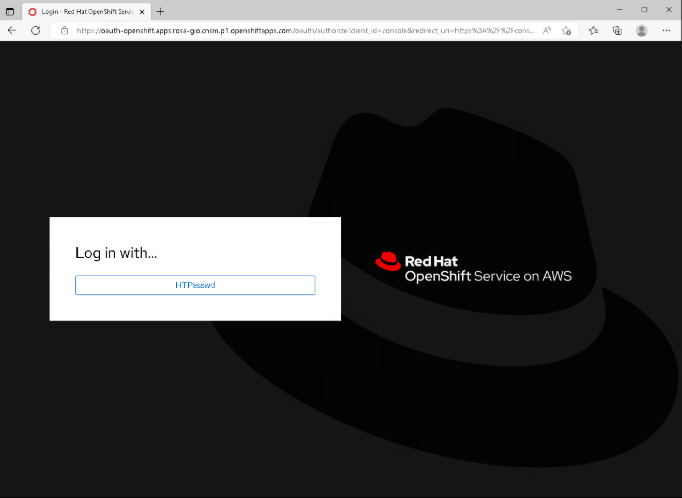
Connect to the instance using your preferred remote desktop tool, you should be able to access the OpenShift console from there and login using the user you defined before.
In this article we created from scratch the AWS VPCs infrastructure, connected them using a Transit Gateway and installed a Red Hat OpenShift on AWS (ROSA) in one of the private VPC. If you are interested in deploying an OpenShift cluster in a private AWS VPC, this is one of the ways to do that.
References:
- Installing or updating the latest version of the AWS CLI: https://docs.aws.amazon.com/cli/latest/userguide/getting-started-install.html
- AWS CLI Configuration: https://docs.aws.amazon.com/cli/latest/userguide/cli-configure-quickstart.html


Website : http://giofontana.github.io